Intermediate Biceps Workout
Whereas the beginner bicep routine focused primarily on the core bicep movements and addressed form and technique, this intermediate routine will look more closely at working the biceps through a range of different angles, as well as incorporating in different variations with grips and hand positions.
This particular routine is designed to be most beneficial to those who have been weight training for at least 6 months, and have familiarized themselves with the basic movements highlighted within the beginner program. This is so that the lifter will have be consciously aware of engaging the biceps throughout the movements, and forcing a deep contraction at the end of each rep – especially during the final few repetitions when muscular failure is in effect. The beginner routine will also allow the lifter to train and condition the muscles to become more efficient at working under stress and against increasing resistances. Only once you’ve been able to reach a weight on all exercises that you’re unable to further increase – without dropping below 10 repetitions, and still ensuring proper form and good technique, should you attempt to move forwards and try this intermediate routine, so as to receive the full benefit of the following variations and training methods.
Exercise 1: Machine Curls
Target: 3 sets of 12-10 reps
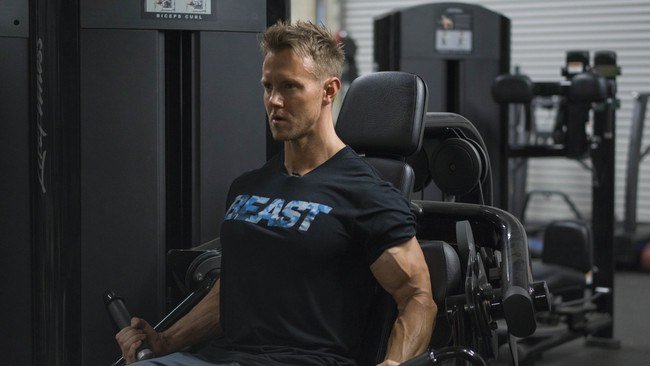
Working the biceps through a fixed range of motion, such on an arm curl machine, will isolate the bicep (long head if arms are at the side of the body, and the short head if the arms are positioned in front of the body), allowing for a deep and forceful contraction. The strictness of this movement may limit the overall weight that you may be lifting, but as far as effectiveness, you can’t do much better than machine curls.
Whilst machines will typically train the muscles through a fixed range of motion, there are still many ways you can add variables into the exercise. After performing the first couple of working sets, where I progress up to my heaviest weight for, say 10 reps, and reach my maximum muscle threshold, I’ll incorporate a Rest-Pause into the next set this. This means lifting the heaviest weight I can for a minimum of 7-10 reps, and once failure is reached, relieving all stress off the muscles by lowering the weight back down and allowing 20 seconds to pass before then attempting a further 2-3 reps at the same weight.
This ‘Rest & Pause’ method is a great shocking principle when working with heavy weights and you may not have a spotter available to help assist during the final few reps of the set. During the 20-second rest period, remain on the machine and focus on deep breathing to slow and control your heart rate. There’s no need to be on your phone, or walking around the gym. Just mentally prepare yourself for achieve several more reps giving it everything you’ve got, but still with using good form and proper technique.
You’ll also see at the end of this exercise within the video, I finish with an isometric squeeze of the biceps for 10 seconds. By consciously and forcefully squeezing the muscles and holding that squeeze for 10 seconds – after having just completed your final working set, you’ll keep all the blood within the muscle and be working towards greater conditioning of the muscles through the isometric hold. This technique doesn’t need to be used after every set, just the final set after having reached your maximum threshold of the muscle.
Exercise 2: Hammer Curls
Target: 3 sets of 12-10 reps
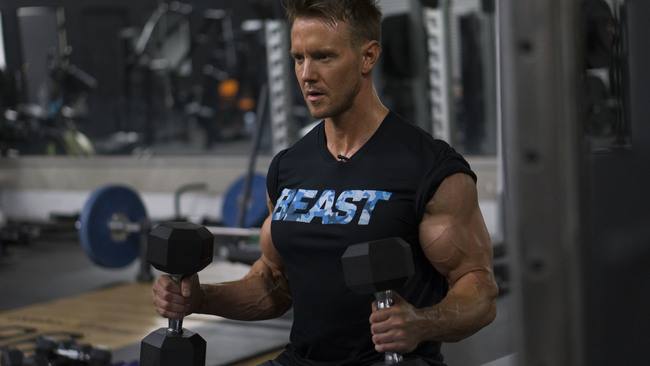
Hammer Curls may at first appear to simply be a slight modification of the standard dumbbell curl, and put simply – they are. However, by keeping your grip around the dumbbells in this fixed neutral/semi-supinated, where the palms face each other with the thumbs at the top, you’ll be feel a very different feeling in your arms as you lift.
First of all, this hand position will target more of the upper forearm, lower/outer bicep region, and is typically used to help develop the brachialis – a muscle in the upper arm that sits deeper than the main biceps, and is a prime mover of elbow flexion. It’s the muscle, that when well developed, can help give a clear distinction between the biceps and the triceps, and almost look as though there’s a smaller bicep muscle between them both (as see in the image above – looking between the bicep and tricep, just above the elbow).
Whilst the technique is practically identical to the seated dumbbell curl, except with a fixed semi-supinated grip, you only need to curl the dumbbells (in their vertical position) as high up towards the shoulder as possible until the elbow begins to pull forwards. I also like to lower the dumbbells all the way down, opening up the biceps for a full stretch.
As seen within the video, I incorporate a series of partial reps, or 21’s as they’re also referred to, within the final working set. This is where I’ll focus on 7 reps performing only ½ of the range of motion (from starting position to only half way up), followed immediately by 7 reps of only the upper ½ of the range of motion, and finishing with up to 7 reps of the full range of motion from start to finish.
The benefit here is to ensure the muscle is strictly worked thoroughly throughout each portion of the lift, and given the volume of the repetitions, can help towards muscular endurance, as well as leaving you with a truly awesome pump in the arms. With this said, you may want to lower the initial weight being used, and focus more so on really engaging the biceps and feeling them being worked through each range of the motion.
Exercise 3: High Cable Curls* & Close-Grip EZ Bar Curls
Target: 3 sets of 15-12 reps
*Each exercise is performed as a superset, one after the other with no rest.
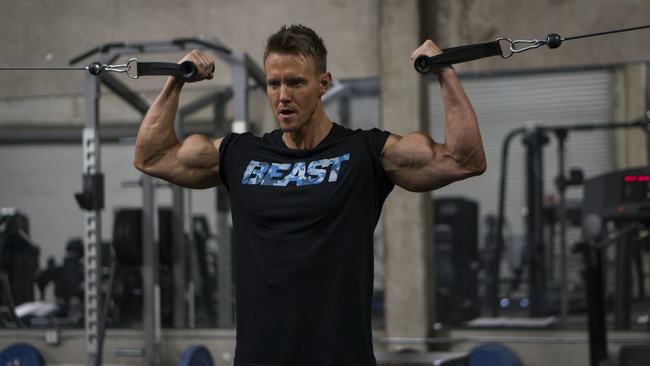
The high cable curls is a great movement that will target the long bicep head and focus on the bicep peak. This is an exercise where you don’t want to go to heavy, but rather focus on the quality of each repetition. I will typically perform this exercise as part of a superset combo, which as you’ll see within the video, is followed immediately after with close-grip EZ Bar curls.
First, lets take a look at the High Cable Curls, which can be set up in a number of different ways. If your gym has two cable pulleys that are far enough apart whereby you can stand in the middle and still have tension on the biceps when holding both handles, arms stretched out, then you can perform both arms at the same time – just make sure the cable pulleys are positioned at a height where the handles and cables are parallel to the floor when your arms are in the final flexed position of the rep. In short, set the cable pulley height to that of your shoulder height.
If you the cable pulleys are not far enough apart to allow for both arms to be trained at the same time, then sometimes, just by taking a step forwards may give you enough distance so that the biceps will feel the weights when the arms are stretched fully out. If this still doesn’t give you enough distance, you can also perform this movement one arm at a time, as well as seated on a bench in the middle.
As you pull the handles in towards the side of your head, your upper arms should remain fixed without movement, and be parallel to the floor (this will ensure that the biceps are doing all the work). The elbows should also be angled directly towards the floor so that you have a straight line from your shoulders, through your arm, and to your wrist/grip. By maintain proper alignment, you’ll be focusing the majority of the work firmly on the biceps, and minimizing any other muscles from doing more than they need to be.
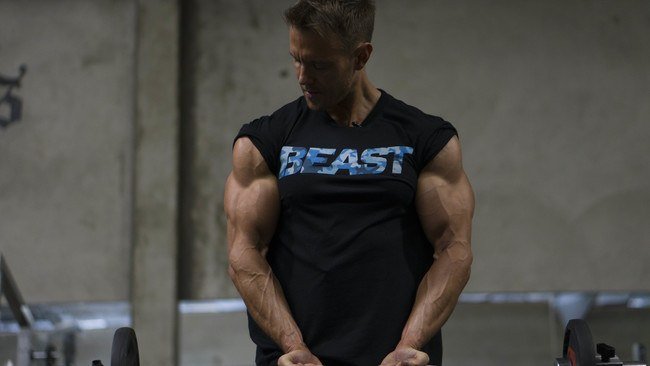
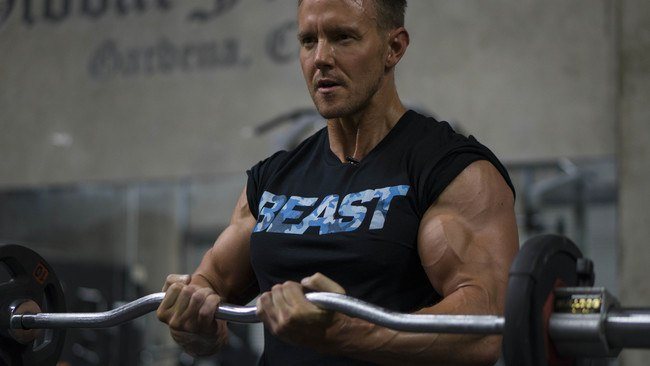
Immediately after finishing each set of high cable bicep curls, have an EZ Bar close by, and begin performing 15-12 reps using a close, under-hand grip, with your elbows angled slightly outwards.
This has been a long-time favorite of mine (this superset combo), as it leaves me with an intense pump in the biceps without needing to be using much weight. If you don’t have access to an EZ-Bar (where the bar is bent in several positions, allowing for more comfort at the wrist when using grips other than a standard underhand grip), you can use a straight bar with more of a standard-width grip, just with the elbows angled outwards, so as not to train the wrists to much.
Allow for full ranges of motions with both movements, and try adding in a 10-second isometric squeeze after performing both exercises, allowing for no longer than 60-90 seconds of rest before attempting the next set. Typically with these, I won’t increase the weights for any sets, as my muscular energy is already very depleted. Instead, I’ll focus on slowing my tempo and holding the final few reps in the contracted position for up to a second or two. You may find that you need to lower the weights after the first set, which is also fine.
Intermediate Bicep Summary
In summary, the intermediate bicep routine introduces a number of training methods and shocking principles into practice. At this level you should have at least 6-12 months of lifting experience, and be comfortably pushing your muscles to their threshold during each workout – especially on the final working sets.
It doesn’t mean you should be trying to constantly push heavier weights, but rather incorporating more variation into each exercise, and making use of a number of shocking principles that will keep the intensity high without needing to increase risk of injury to the muscles and ligaments by always striving for heavier weights.
This routine can be performed 1-2 times within a 7-10 day period, in which I’ll typically focus solely on biceps, followed by forearms on one day, and then towards the end of the week, may train them along with another muscle group, such as back, shoulders, or even triceps.